FreeNAS 9.2.1.5 setup
From FreeNAS using Active Directory Wiki
Contents
Before we start
- We used a virtualized setup in order to create this walkthrough, using generic domain & computer names where possible.
- We used the private IP address range of 10.10.10.x - obviously you'll want to replace our internal IP addresses with your own
- We used a single Active Directory domain controller, to keep things simple. We then configured the following network settings, which is reflected throughout this document:
- Gateway: 10.10.10.1
- DNS: 10.10.10.3
- NTP: 10.10.10.3
- DC (Domain Controller): 10.10.10.3
- FreeNAS: 10.10.10.4
- We used a single Active Directory domain controller, to keep things simple. We then configured the following network settings, which is reflected throughout this document:
- Where appropriate, we'll make a note of where additional server IP's can be entered, for redundancy
Getting started with FreeNAS
Initial connection
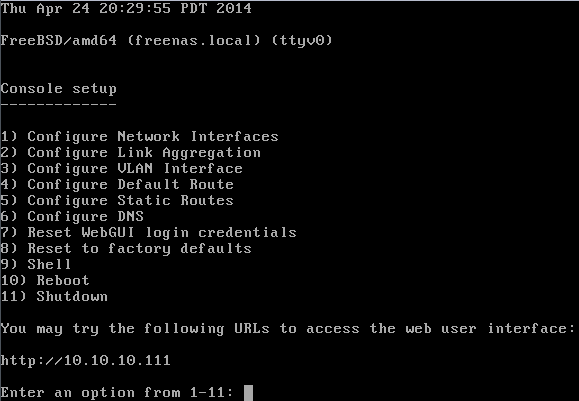
- When FreeNAS 9.2.1.5 is first installed, the network adapter is set to DHCP - we will change this a few steps down. We will be configuring FreeNAS purely from the webUI, so make a note of the IP on the FreeNAS server console:
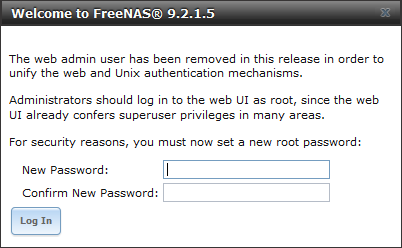
- Use your favorite web browser to connect to that address - the first visit to the FreeNAS webUI will prompt you for a password, for the default user root
Configuring networking
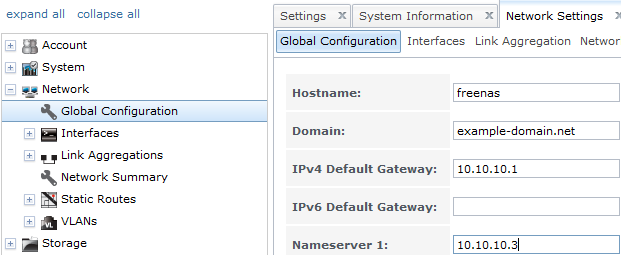
- Click on Network -> Global Configuration
- Hostname: freenas (this needs to match the DNS "A" record & computer account name you created during the Active Directory prep)
- Domain: example-domain.net
- IPv4 Default Gateway: 10.10.10.1
- Nameserver 1: 10.10.10.3
- Click "Save"
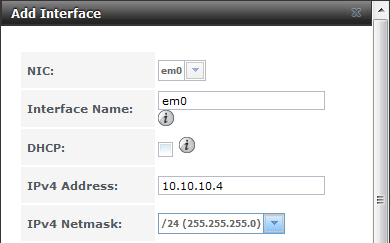
- Click on Network -> Interfaces -> Add Interface
- NIC: select the NIC being used by FreeNAS (single NIC systems only have 1 item in the dropdown list)
- Interface Name: em0 (We named it the same as what FreeNAS names it, for consistency - you can name it whatever you like)
- DHCP: unchecked
- IPv4 Address: 10.10.10.4 (this needs to match the DNS "A" record you created during the Active Directory prep)
- IPv4 Netmask: /24
- Click "Save"
- The new IP address takes effect immediately - repoint your browser to the new address to continue
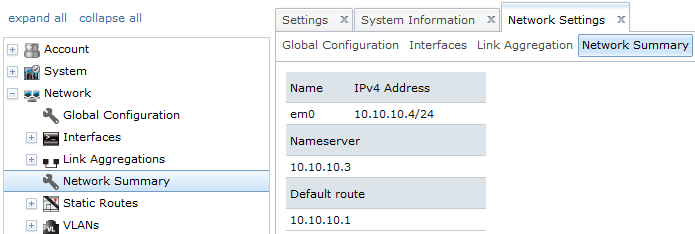
- Click on Network -> Network Summary to verify previous settings
Configuring Time Server
- Click on System -> NTP Servers -> View NTP Servers
- Remove all 3 default NTP servers
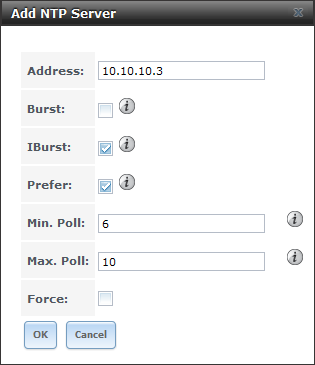
- Click Add NTP Server
- Address: 10.10.10.3
- Prefer: checked (only if you have other time servers configured)
- Leave everything else at its default setting
- Now that the time server is set, you need to set your time zone
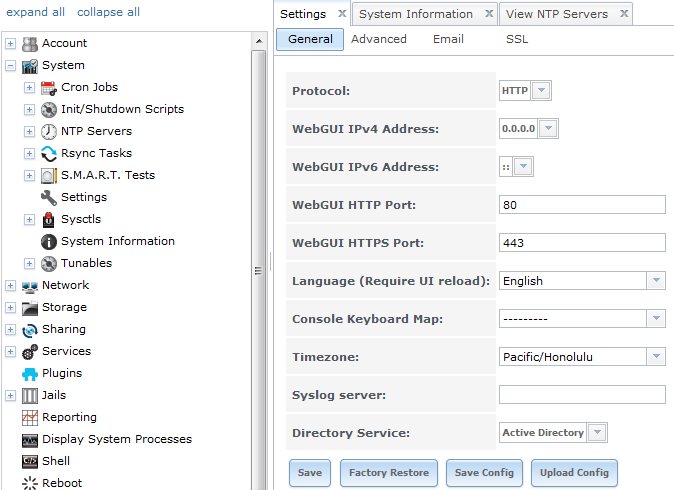
- Click on Settings -> General
- Timezone: (obviously select YOUR time zone)
- Directory Service: Active Directory (since we plan on using Active Directory)
- Click "Save"
Creating a Storage Pool
- Your storage pool has to be created before you configure FreeNAS to use Active Directory, however that is beyond the scope of this how-to
- We suggest giving cyberjocks excellent PowerPoint presentation explaining VDev, zpool, ZIL and L2ARC
