FreeNAS Corral 10.x setup
From FreeNAS using Active Directory Wiki
Contents
Before we start
- We used a virtualized setup in order to create this walkthrough, using generic domain & computer names where possible.
- We used the private IP address range of 192.168.15.x - obviously you'll want to replace our internal IP addresses with your own
- We used a single Active Directory domain controller, to keep things simple. We then configured the following network settings, which is reflected throughout this document:
- Gateway: 192.168.15.1
- DNS: 192.168.15.3
- NTP: 192.168.15.3
- DC (Domain Controller): 192.168.15.3
- FreeNAS Corral: 192.168.15.4
- We used a single Active Directory domain controller, to keep things simple. We then configured the following network settings, which is reflected throughout this document:
- Where appropriate, we'll make a note of where additional server IP's can be entered, for redundancy
- Generic Password: HorseBattery@2017
Getting started with FreeNAS
Initial connection
- When FreeNAS Corral 10.0 is first installed, the network adapter is set to DHCP - we will change this a few steps down. We will be configuring FreeNAS purely from the webUI, so make a note of the IP on the FreeNAS server console:

- Use your favorite web browser to connect to that address - The FreeNAS webUI will prompt you for a password, for the default user root using the password you set during the installation routine.
- To change from a dynamic IP to a static IP, after you log in, on the left menu click on Network -> Interfaces -> "Interface name" (dhcp)

- On the next screen, uncheck DHCP, and then:
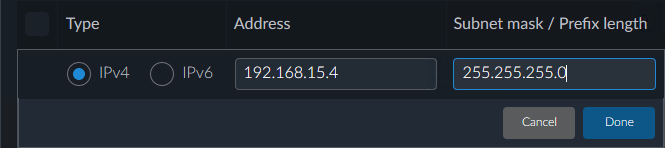
- Click on Add address
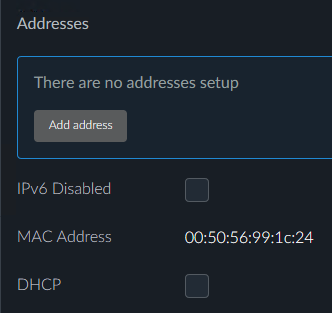
- Click the IPv4 radio button, and add 192.168.15.4 under Address, and 255.255.255.0 under Subnet mask / Prefix length and click Done, then click Save at the bottom of the page, and then click Save again.
- Then click on Settings under Interfaces, and change the following:
- Hostname: freenas.mai-dev.net
- HTTP Proxy: leave blank
- DHCP Settings
- Assign Gateway: uncheck
- Assign DNS: uncheck
- Gateway Settings
- IPv4: 192.168.15.1
- IPv6: leave blank unless you're actively using IPv6 in your environment
- DNS Settings
- IP Addresses -> Add DNS Address: 192.168.15.3
- Search Domains -> Add Search Domain: mai-dev.net
- Click Save


Configuring Time Server
- On the left menu, click System -> Language & Region
- Change the timezone to the timezone you FreeNAS server resides in (I used Pacific/Honolulu for this demo)
- Then, again from the left menu, click System -> NTP -> NTP Servers
 -> Add an NTP Server
- Address: 192.168.15.3
- Initial Burst: checked
- Preferred: checked - only if you're leaving the default NTP servers in place, otherwise leave unchecked
-
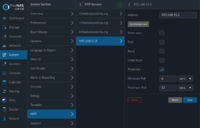 When everything is done it should look like this (click image to zoom)
 - Click Save, then click on Dashboard to verify proper System Time

Connecting to Active Directory (finally!)
- From the left menu, click on Accounts -> Directory Services
- NTP Servers: Select 192.168.15.3 from the drop down menu and then click Synchronize with NTP server (just to be safe).
- Then click on Active Directory and fill in the required information:
- Name: active directory testing (or whatever you want)
- Domain Name (DNS/Realm-Name): MAI-DEV.NET
- Domain Account Name: freenasadmin
- Domain Account Password: HorseBattery@2017
- Enabled: checked
- Verify everything:
 (click image to zoom)
 - Click on Save
- If it worked, there should be a green "dot" next to the Active Directory box:
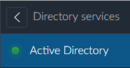
- If it worked, there should be a green "dot" next to the Active Directory box:
- You should be able to see users in Active Directory at this point by clicking on Accounts -> Users:
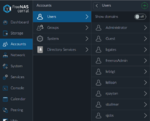 (click image to zoom)
- Then click on Active Directory and fill in the required information:
- NTP Servers: Select 192.168.15.3 from the drop down menu and then click Synchronize with NTP server (just to be safe).


Creating a Storage Pool
- This is beyond the scope of this walkthrough, however:
- The official FreeNAS wiki is an excellent resource on creating your storage pool.
- We also suggest giving cyberjocks excellent PowerPoint presentation explaining what VDev zpool, ZIL and L2ARC is.
- After your pool is created, we suggest creating a dataset specifically for CIFS sharing.
- Again, the official FreeNAS wiki is a good source of info on how to do this
Prepping SMB (CIFS) File Sharing
- From the left menu, click on Services -> Sharing -> SMB
- Enabled: checked
- NetBIOS Name: FreeNAS
- Workgroup: MAI-DEV (this should match your domain name, only without the .com .net etc etc...)
- Description: FreeNAS Plexmedia Server
- Server minimum protocol: SMB2 (unless you're using clients older than Windows Vista)
- Everything else, leave at the default settings
- Click Save